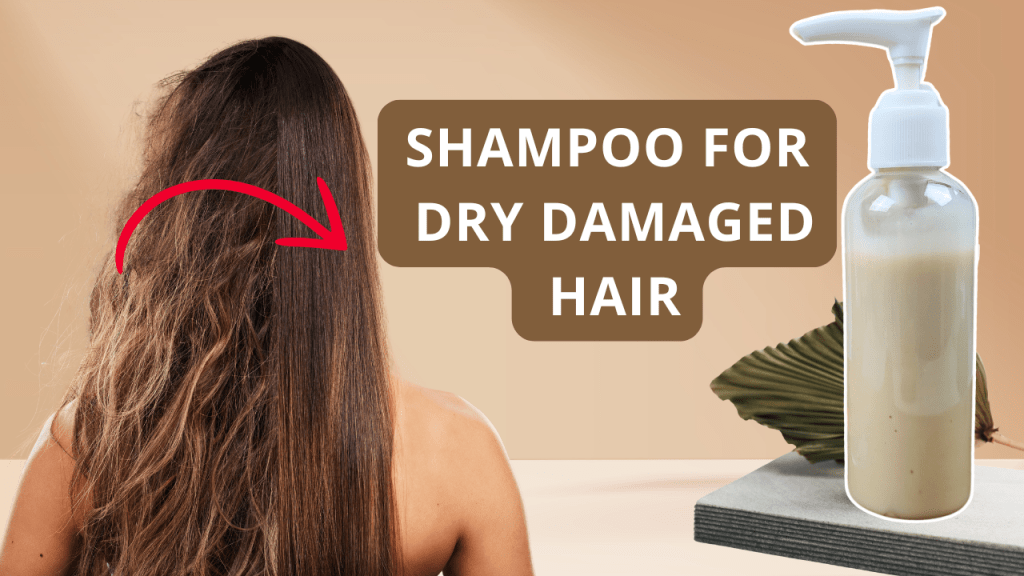
Are you tired of battling dry, damaged, and frizzy hair? If so, you’re in the right place! In this blog post, we’ll show you how to make a hydrating and repairing shampoo that nourishes and restores your hair. Packed with natural oils, butters, and active ingredients, this homemade shampoo will leave your hair soft, shiny, and manageable. Let’s dive in!
Why Use a Homemade Shampoo?
Store-bought shampoos often contain harsh chemicals that can strip your hair of natural oils, making dryness and damage worse. By making your own shampoo, you have complete control over the ingredients, ensuring they are gentle, natural, and tailored to your hair’s needs. This recipe is perfect for dry, damaged, and frizzy hair because it’s designed to:
- Restore hydration.
- Strengthen hair strands.
- Protect against further damage.
- Reduce frizz and leave hair soft and manageable.
What Makes Hair Dry, Damaged, and Frizzy?
When your scalp doesn’t produce enough natural oils, your hair becomes dry and brittle. The outer layer, called the cuticle, becomes rough and porous, allowing moisture to escape. This causes frizz, tangles, and a dull appearance.
Damage happens when the cuticle is physically or chemically compromised—through heat styling, coloring, or over-washing—leading to split ends, breakage, and a loss of elasticity. The key to reviving your hair is to use ingredients that hydrate, nourish, and repair, which is exactly what this shampoo does.
Ingredients for This DIY Shampoo
Here’s a detailed breakdown of the ingredients and why they’re included:
Oil Phase Ingredients
- Herbal-Infused Oil (6g)
- Why Use It? This oil is infused with herbs like henna and shikakai, which strengthen and nourish the hair while promoting growth. Coconut and olive oils are the base, providing deep hydration and protection.
- Optional Substitute: Plain coconut or olive oil if you don’t have an infusion.
- Mango Butter (2g)
- Why Use It? Mango butter is a rich, natural moisturizer that helps repair damaged hair and soothe a dry scalp.
- Optional Substitute: Shea butter for similar benefits.
- Dimethicone(1g) and Coco Silicone (1g)
- Why Use It? These lightweight silicones help detangle hair, reduce frizz, and create a smooth, glossy finish.
- BTMS-50 (3g)
- Why Use It? A conditioning emulsifier that helps combine water and oil while leaving hair soft, smooth, and manageable.
- Cetyl Alcohol (2g)
- Why Use It? Adds thickness and creaminess to the shampoo while enhancing conditioning benefits.
Water Phase Ingredients
- Herbal-Infused Water (34.95g)
- Why Use It? Matches the nourishing benefits of the infused oil to boost hydration and scalp health.
- Optional Substitute: Distilled water or hydrosols like rose or chamomile for added hydration.
- Aloe Vera Juice (8g)
- Why Use It? A powerful hydrator that soothes the scalp and helps repair damaged hair.
- Note: Aloe vera gel is not recommended as it may affect the formula’s stability.
- Glycerin (4g)
- Why Use It? A humectant that attracts moisture to the hair, keeping it hydrated.
- Xanthan Gum (1g)
- Why Use It? A thickening agent that helps stabilize the water phase.
Surfactant Phase Ingredients
- Coco Glucoside (16g)
- Why Use It? A mild, plant-based cleanser that gently cleans without stripping natural oils.
- Decyl Glucoside (6g)
- Why Use It? Another gentle surfactant that works well with coco glucoside for effective cleansing.
- Optional Substitute: Coco betaine.
- Sodium Cocoyl Isethionate (SCI) (8g)
- Why Use It? A sulfate-free surfactant that cleans while conditioning, leaving hair soft and manageable.
Cool-Down Phase Ingredients
- Polyquaternium-7(2g)
- Why Use It? Reduces frizz, detangles, and adds smoothness.
- Hyaluronic Acid (.1g)
- Why Use It? A humectant that deeply moisturizes and keeps hair hydrated.
- Rice Protein (2g)
- Why Use It? Strengthens hair structure and prevents breakage.
- Vitamin C (Ascorbic Acid) (2g)
- Why Use It? Enhances shine, promotes scalp health, and supports hair growth.
- Vitamin E (.5g)
- Why Use It? An antioxidant that protects hair from environmental damage.
- Rosemary Essential Oil (.25g)
- Why Use It? Adds a fresh scent while promoting scalp circulation and hair growth.
- Liquid Germall Plus (.2g)
- Why Use It? Preserves the shampoo and ensures it stays safe to use.
How to Make the Shampoo
Step 1: Prepare the Oil Phase
- Combine all the oil phase ingredients in a heat-safe container.
- Set aside for the double boiler.
Step 2: Prepare the Water Phase
- Mix xanthan gum with glycerin to form a slurry.
- Combine with herbal-infused water and aloe vera juice. Stir well and set aside.
Step 3: Prepare the Surfactant Phase
- Combine all surfactants (coco glucoside, decyl glucoside, and SCI) in a separate container. Set aside.
Step 4: Heat and Combine Phases
- Heat the oil and water phases in a double boiler until both reach 75–80°C.
- Slowly pour the water phase into the oil phase while blending with an immersion blender. Blend for about 30 seconds until an emulsion forms, then switch to a spatula to avoid air bubbles.
Step 5: Add the Surfactant Phase
- Gently mix the surfactant phase into the emulsion using a spatula. Avoid overmixing to prevent foam.
Step 6: Cool Down and Add Actives
- Let the mixture cool to around 40°C.
- Add the cool-down ingredients (Polyquaternium-7, hyaluronic acid, rice protein, vitamins C and E, rosemary essential oil, and Liquid Germall Plus). Stir gently to combine.
Step 7: Adjust the pH
- Check the pH using a pH meter or strips. Adjust to 5.5 by adding lactic acid (to lower) or baking soda (to raise).
Step 8: Bottle and Let Set
- Pour the shampoo into a clean, sterilized bottle and let it sit overnight to stabilize and thicken.
Tips for Success
- Use precise measurements for stability.
- Avoid overmixing to prevent bubbles and foam.
- Always check the pH to ensure the shampoo is safe and effective.
Final Thoughts
Making your own shampoo is a rewarding way to care for your hair naturally. This DIY shampoo is packed with ingredients that hydrate, repair, and protect dry, damaged, and frizzy hair.
If you try this recipe, let me know how it works for you in the comments below! Don’t forget to subscribe to my YouTube channel for more natural beauty recipes.


Laisser un commentaire